A Guide To Recording Authentic-ish Video Walkthroughs
tldr
Authentic videos with a genuine and human approach just work better. This holds true for startup product demo videos. In this article, I share my process for creating authentic but still somewhat polished tutorial videos, using an adlibbed script as a basis. I share the tools, process and the drawbacks (there are some) below.For some inexplicable reason, over the past few weeks, I’ve thrown myself—with gusto—into learning, mostly via YouTube.
I learned to give my son a haircut (luckily his three-year-old friends are pretty forgiving).
I’ve learned about triads and scales, adding some theory atop a few decades of campy, not-so-skilled guitar playing.
I learned a lot of other things - including that there is a lot of fantastically terrible content out there.
But while watching many of the influeducators (is that a thing? If not, I want naming rights), I was most taken by their style.
The ones that I liked tended to be authentic. Or at least feigned it. Yes, I’m cynical enough that I think Sarabi, Simba’s mom, was in on Mufasa’s assassination, so obviously I know that the authenticity is frequently forced.
But oh god, does it work.
Which got me thinking about some video tutorials I’ve recently seen from startups.
I generally know what I want when I’m looking for a tech product so when I come across a quick five-minute video walkthrough of a product, it’s my jam. And I’ve found that the more authentic ones speak volumes to me.
Here’s a great example, filmed by the folks from Reflect.app, my ❤️ note-taking app.
I’m going to unpack why it works, the price, and then share my method for recording these types of videos, while striking a balance between authentic and calculated.
Just like a good date.
But first…
Why authenticity works
I think there are a few reasons why these videos resonate so well:
- The one-shot recording style feels real, like a demo from someone who already knows what I’m looking for.
- When a human presents (well) to another human, they tend to present in humanese, without the gibberish.
- This style places a premium on being relatively short so the producer needs to filter what makes the cut and what doesn’t.
- They create an opportunity for the presenter to make an emotional connection - like joking about a loading screen or griping about a common industry challenge.
The end result is that you get a straightforward view of a product built by a real human who loves the product and built for a real human who wants to buy that product. .
It comes at a price
One-take shots are scary. They require either memorizing a script or making stupid mistakes, crafting out a walkthrough, and then hoping the product works perfectly. They also make it harder to collaborate with other people in your company since you’re just banging them out in one fell swoop.
So yea, you can record it, but if your CEO doesn’t like the way you rolled your R, it’s a rrrrrrestart. Also, it can be stressful AF just waiting for that notification banner to pop up about a message while you’re in the middle of your take.
How I record them
So I get around those challenges.
My solution is to preserve the kernel of authenticity that the videos are rooted in - some light humor, a few mistakes, offhand remarks while things are loading, and first-person references (e.g., “my favorite part of this is…").
But I also recognize that most things we feel are authentic right now are - at least slightly - edited and upgraded. You need to compete on that playing field for a video you stand behind.
First, here’s an example of what you’ll walk out with after the process. This entire video - start to finish - took about 2.5 hours.
What does it take?
In short, my process is:
- Transcribe the audio of me doing an unscripted demo
- Tweak the transcription into a script
- Record the audio track
- Add in a few slides and a the screen recording
- Edit it all together
- Celebrate
Want the process in more detail? Thought you’d never ask.
The Tools They Carried
You’ll need to know what you’re recording the video about…and you’ll need to have the tools to record it. I use some paid tools but a ton of alternatives exist.
Here’s what you should have if you’re following my playbook:
- A deep knowledge of your product (you better already have this).
- The pain points and features that resonate with your user (you should also have this).
- Google Docs and Slides.
- A video editor (I use ScreenFlow for Mac).
- A screen recorder (I use Screen Studio since it looks very, very slick).
- Access to some AI transcriber tool (I use MacWhisperer).
The last three tools are all paid tools but will pay themselves back in just weeks if you’re a marketer that likes to get your hands dirty.
One caveat - this style does sway a little towards a more formal variation of these videos. I throw in a few slides in the intro and don’t include a video of myself speaking…but you can use the exact same method that I use and nail that flavor if you prefer.
The Process
So, remember, the goal is to come across as human, while still nailing everything that you want to communicate. Here’s how to do that:
1) Writing The Script
Make a list of the key value props that your product offers and the core features that you want to demo. Write it down. You’ll need it.
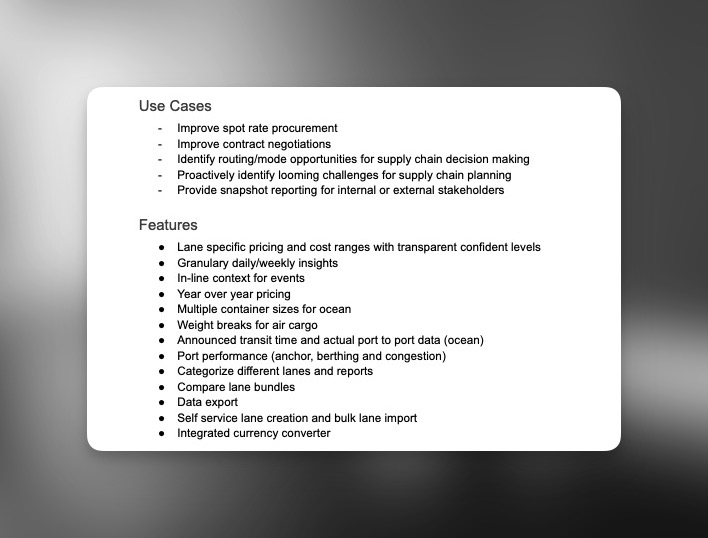
Nothing fancy. I probably could have even dumbed down the text in the benefits section
If you are collaborating with other people on this, now’s the time to share that quick list to make sure you didn’t screw up.
Now open up your product and just click around a bit to make sure you can get to all the features you plan on showing. Don’t spend too much time on this.
Now here is where we add in the flavor.
Flip on your voice transcriber and just dive into demo mode. Pretend like you’re showing the product to a friend who understands the space. Begin with a quick minute spiel about the product, the value props, and features and then just start demoing. You’re not recording your screen, just transcribing the audio. Screwed up? That’s fine, just keep going.
Congrats, you’re the owner of a new script framework.
Copy it to a Google Doc and start cleaning it up…a bit. Do not change it too much. This is the part where you’re controlling for brain farts, not turning it into too artificial of a script.
If you are working on this with someone else, shoot them over the script for them to review. Only have them flag mistakes or things you left out, not style.
2) Recording The Script
Using your video editor, record yourself reading the script out. You can use the video camera if you want but I personally tend not to. If you do screw up, just go back to the previous paragraph and rerecord.
3) The Video
Now it’s time to put the video together. Since I lean towards slightly more formal, my videos usually have four parts:
- Intro - the normal intro animation we use for our videos.
- Pre-walkthrough - a quick review of the use cases and features accompanied by a super basic list that builds in.
- Walkthrough - The meat ‘n’ potatoes.
- Outro - the normal outro animation we use for our videos.
The first and last are just templates so they just take a second. The pre-walkthrough is also basically a templated background slide that I add text onto.
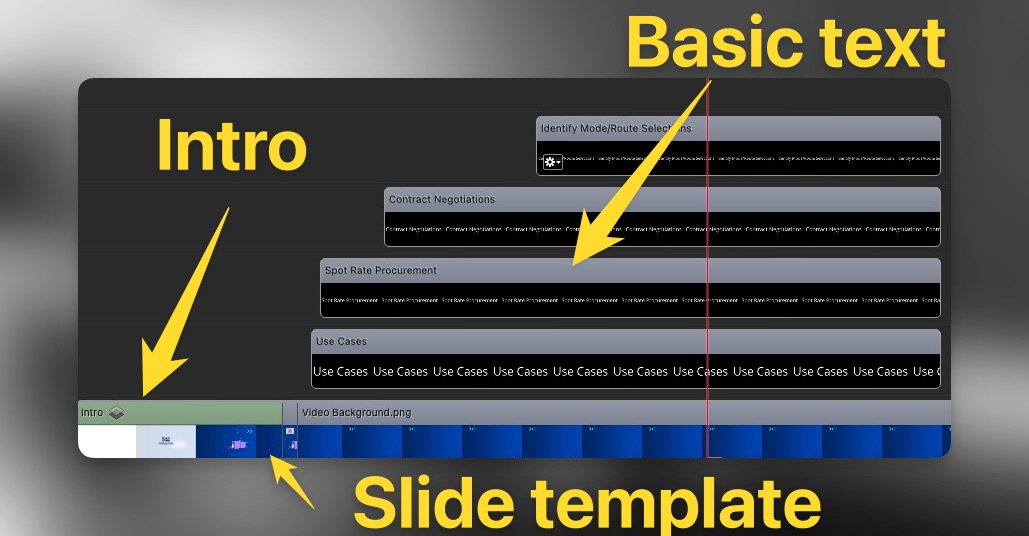
What my video editor looks like
But the walkthrough takes some time.
Using the script as a reference, I know exactly what I need to type or click on. I’ll typically print (gasp) up a copy of the script and highlight where actions are required. Then, using Screen Studio (although anything works) I’ll just record myself doing those exact actions while not making even the vaguest effort to align with the timing. That said, I always make sure to hang out and leave the mouse in one place for 2-3 seconds between different features or important clicks.
Here’s why.
After throwing the audio and the intro, pre-walkthrough, and outro into the video editor, I then add in the screen walkthrough that I recorded. The screen walkthrough is usually much shorter than the actual audio since I just switched between features.
But this is the part where you get to feel smart.
Since I stopped my mouse between features, all I need to do is create a freeze frame at any point the mouse is stopped, extend that image for as many seconds as I need so I can stay in line with the voice, and then keep the video going. Or, I can ramp up or down the speed of the clip to make it fit better.
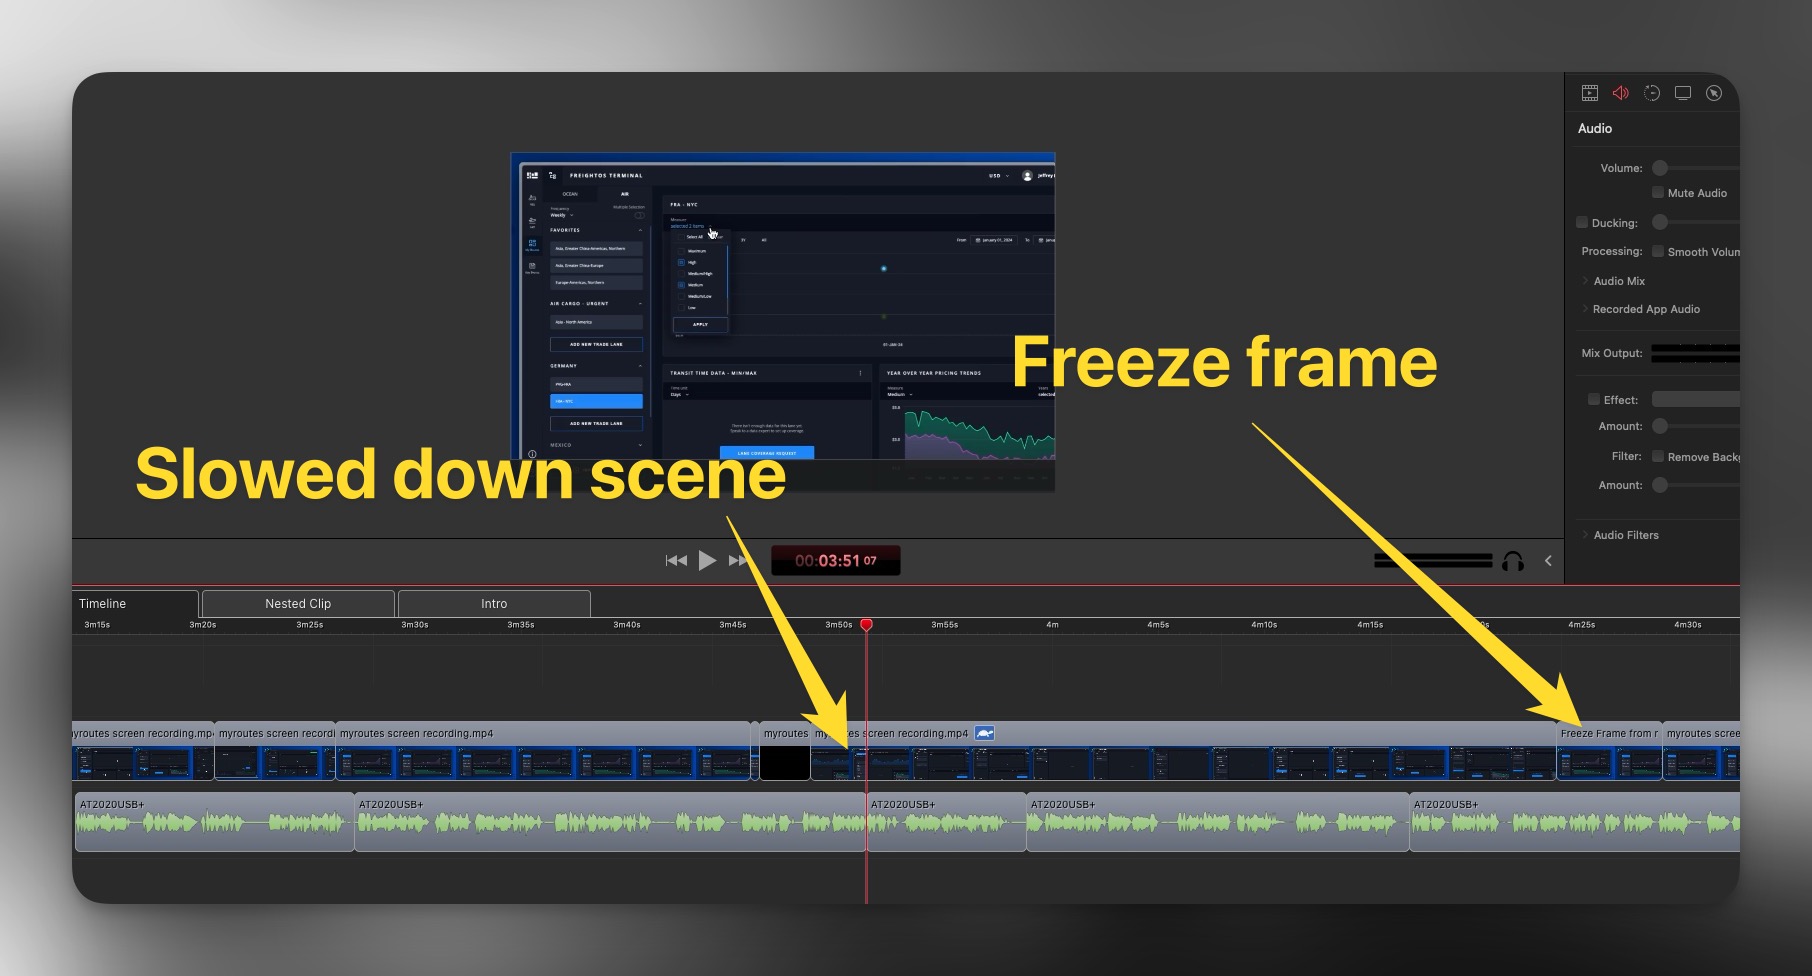
See how easy it is to make the video I recorded fit the audio?
That’s it.
For a typical product, this entire process, start to finish, can sometimes take as little as two hours. Yes, that’s a far cry from the actual five minutes it would take to record it (or, more realistically, 30 minutes for at least six takes that still leave a resoundingly eh product), but the level of production is really that much better.
Bringing it all together
Ultimately, this is about creating a real connection with your viewer.
Over-produced videos are fun to watch when you’re watching Michael Bay slam cars into trucks. But when you just want to understand how and why a product works, this is, hands down, the most bang-for-buck way to make it happen.
Questions? Drop me a line!